DIY Paper Flowers Prop
All in all, Creating stunning DIY paper flower props for photoshoots is a fantastic and rewarding project. Let’s enhance your step-by-step guide with some tips and tricks to make the process even more enjoyable and the results even more impressive. Altogether, DIY Paper Flowers Prop are awesome!
Materials Needed for DIY Paper Flowers Prop:
- Glue Stick
- Choose a high-quality glue stick for a secure hold.
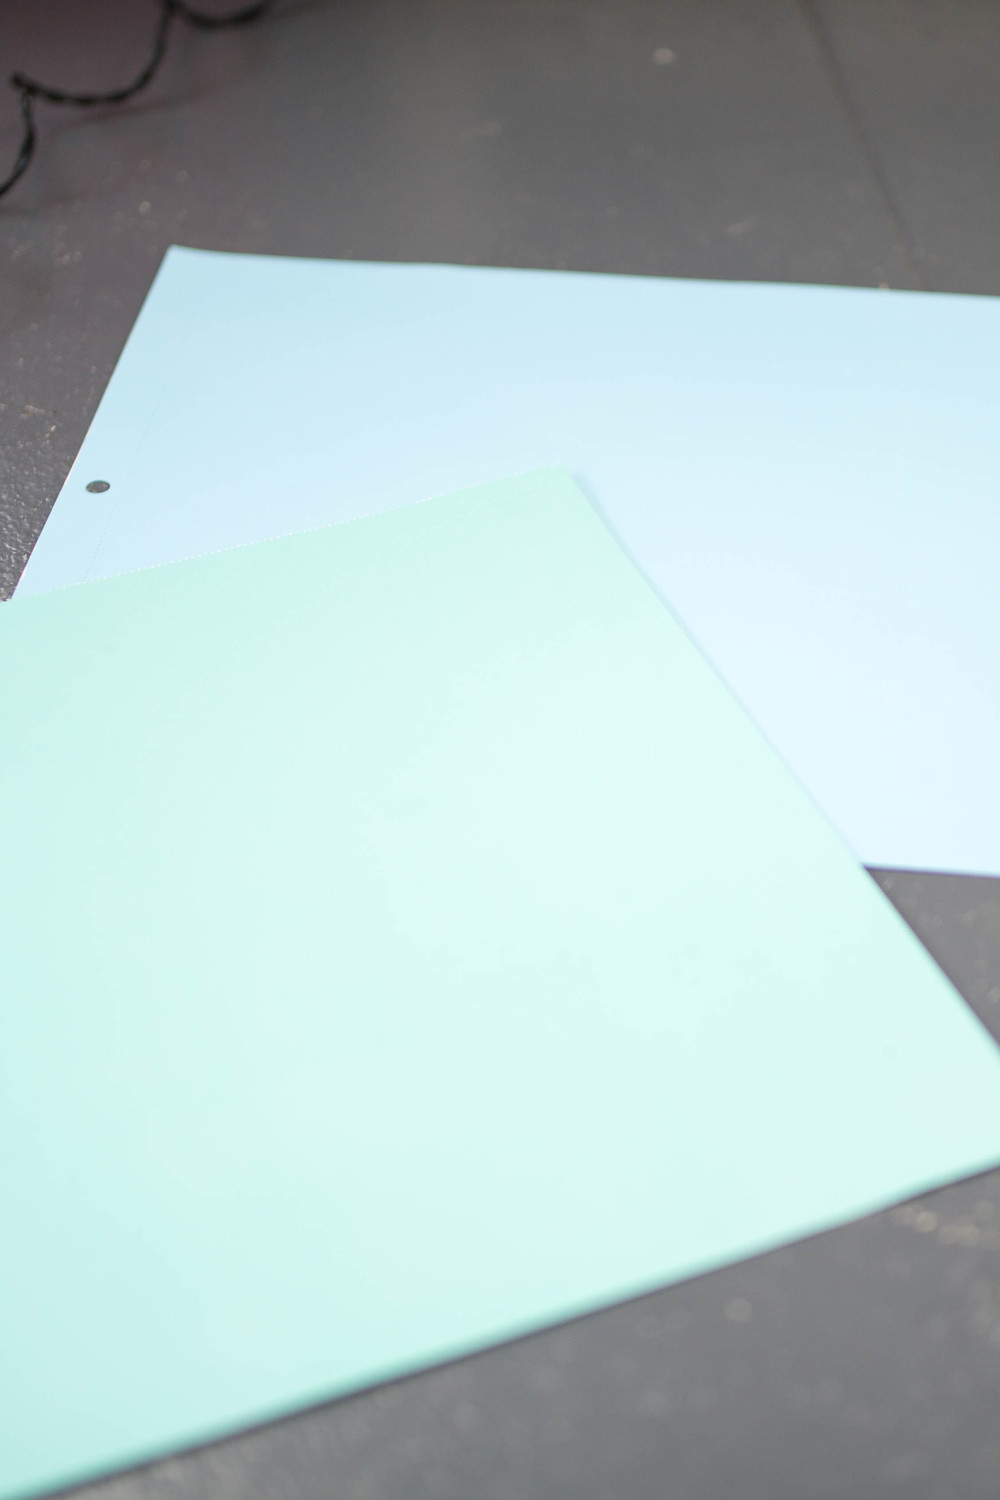
- Two 12×12 Scrapbook PaperOpt for two shades of the same color or complementary colors for a visually appealing effect.
- Scissors
- Ensure your scissors are sharp to achieve clean and precise cuts.
- Pencil
- Also, Use a pencil for marking and shaping the petals.
- Two Round Circles / One Round Glitter Paper
- Also, These will be the centers of your flowers. Get creative with glitter paper for added sparkle.
Step-by-Step Guide:
1: Choose Your Colors
- All in all, Select scrapbook papers in colors that complement each other or create a gradient effect. This will add depth to your flowers.
2: Cut the Petals
- All in all, Draw a petal shape on one of the 12×12 papers. It doesn’t have to be perfect – imperfections can add character.
- Cut out the petal shape. Use this as a template to cut petals from the second paper.
THREE: Shape
- Take each petal and gently curl the edges using your pencil. This adds a lifelike and dimensional quality to the petals.
4: Glue
- Start gluing the petals onto the center circles. Overlap them slightly for a fuller look.
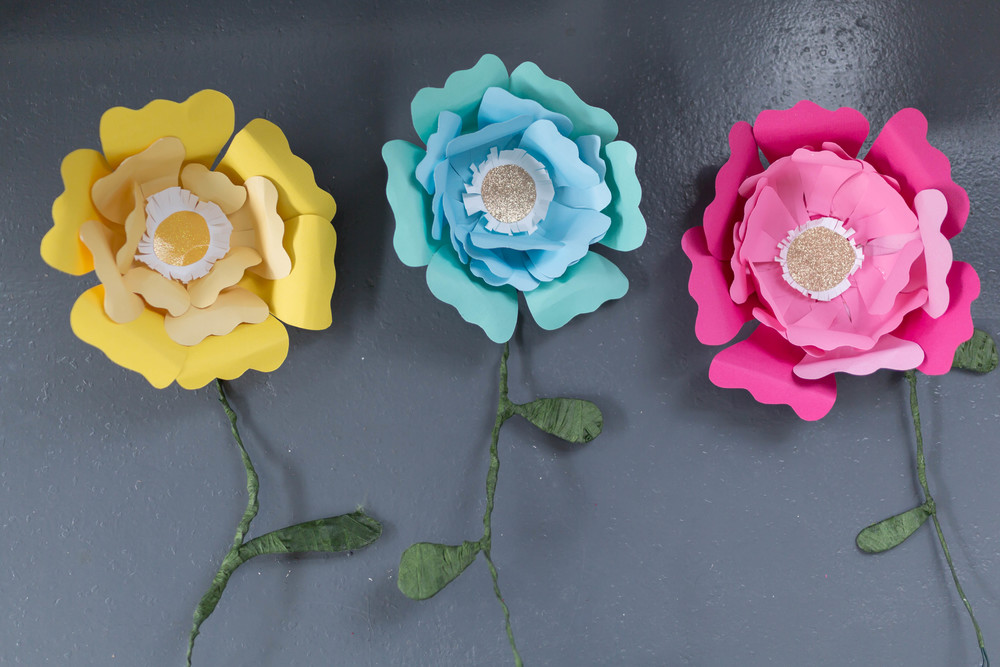
- Continue until you’ve filled the entire circle, All in all, creating a beautiful layered effect.
FIVE: Add Glitter Center (Optional)
- If you have glitter paper, cut a smaller circle to serve as the flower’s center. Glue it in the middle for a touch of glamour.
SIX: Customize
- Don’t be afraid to also experiment with sizes, shapes, and colors. Varying the sizes of petals or using different color combinations can result in a diverse and captivating set of flowers.
7: Display Creatively
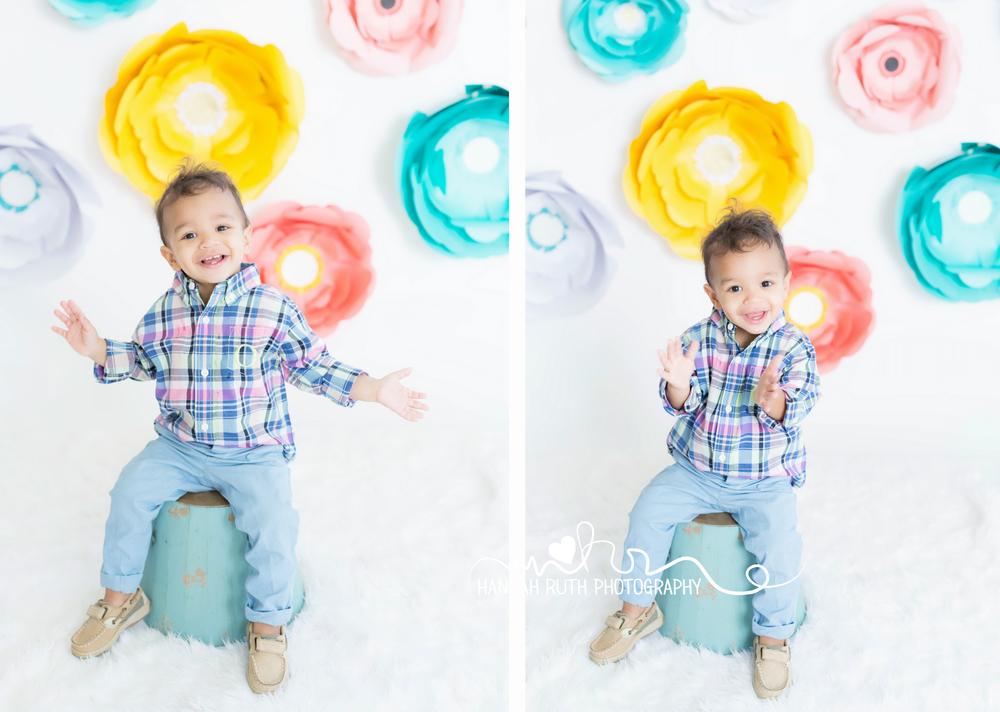
- Once your flowers are complete, also arrange them in a backdrop that complements your photoshoot theme. You can attach them to a backdrop board or hang them for a whimsical effect.
Also remember, the beauty of DIY lies in embracing imperfections and letting your creativity flow. Enjoy the process, and your handmade paper flowers will undoubtedly elevate your photoshoots with a touch of charm and uniqueness. Happy crafting! 🌸✨📸
OKAY!! Here we go!!! <3 I am not the best at this stuff so bare with me!! & Thank you for taking the time to check this out!! Im excited! Altogether.
First..
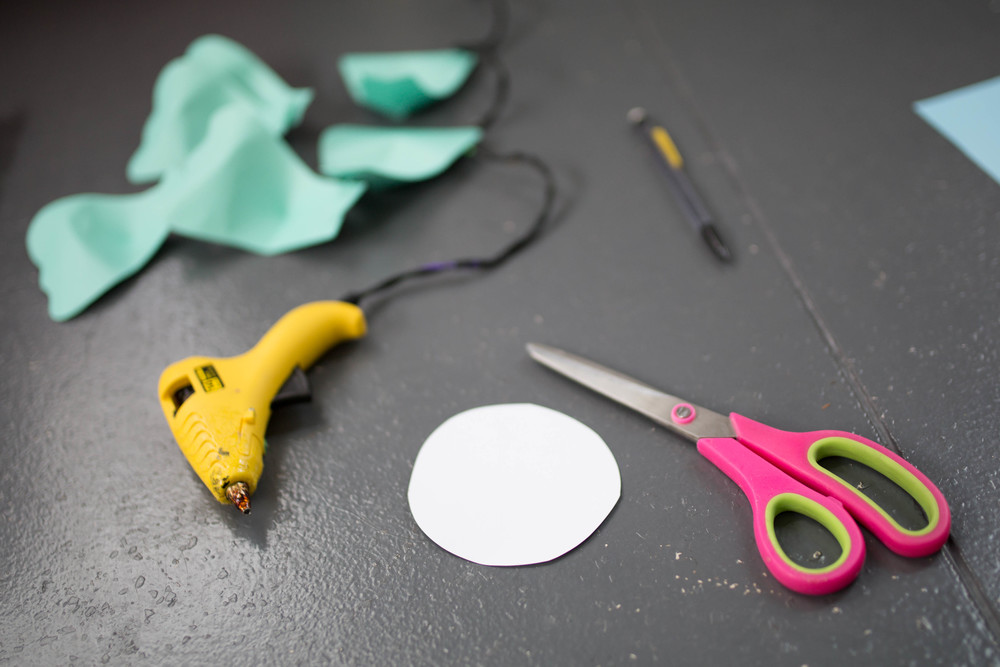
Make sure you have all your materials in ready!!! & LETS DO THIS.. and remember this is not hard… I promise!
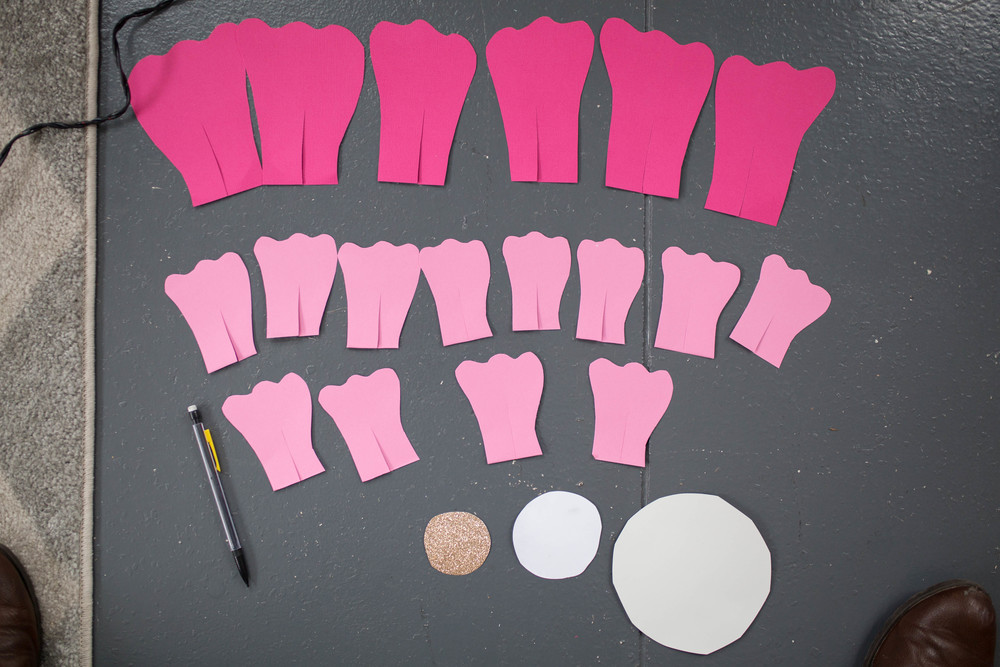
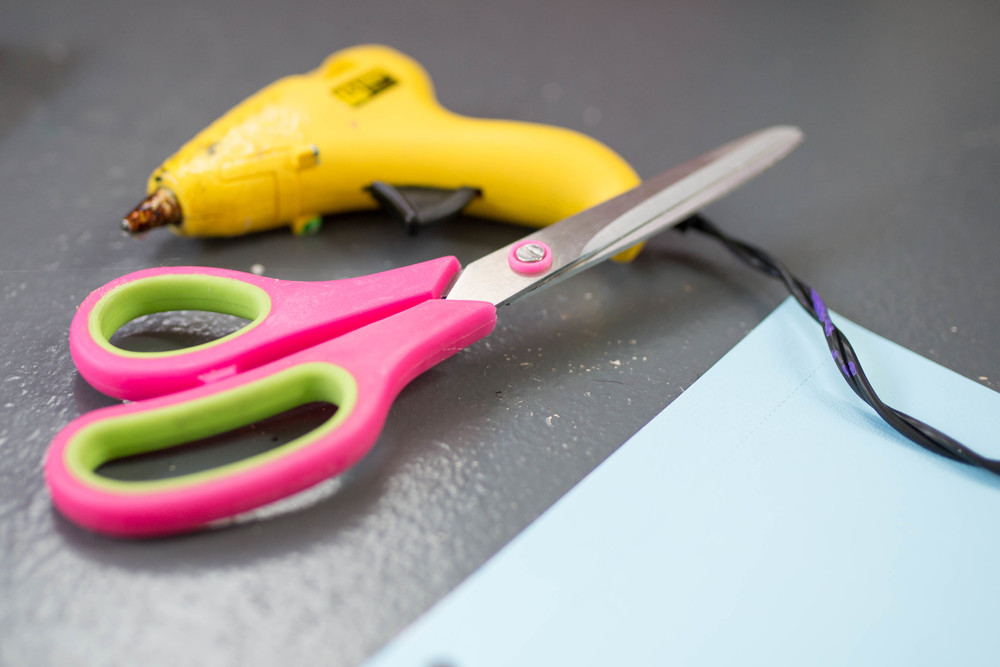
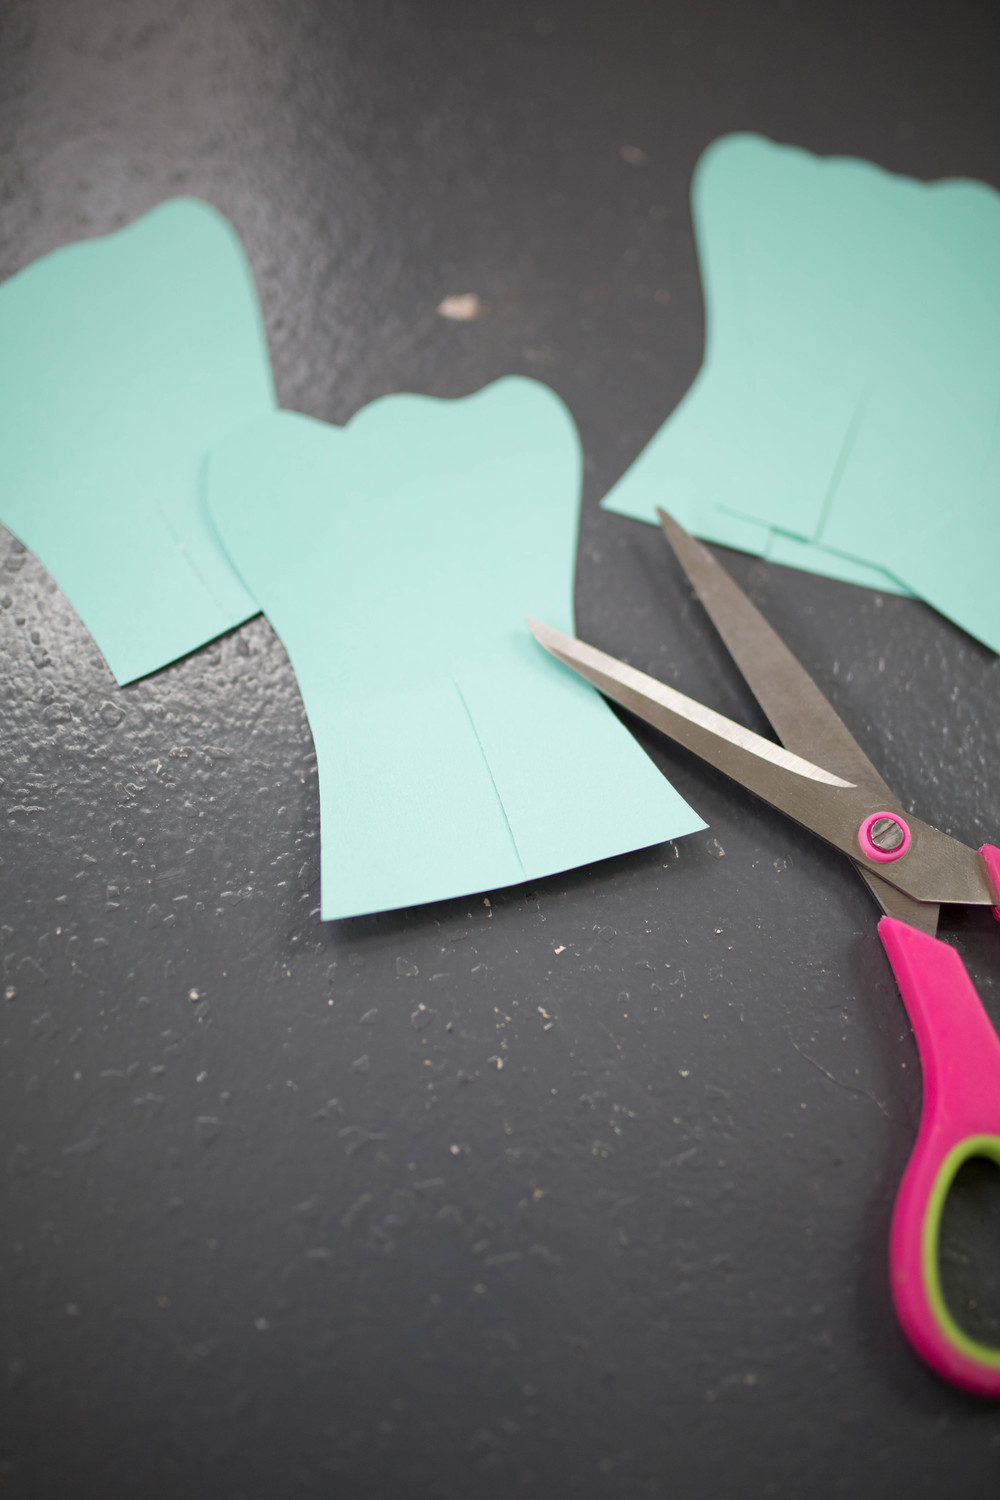
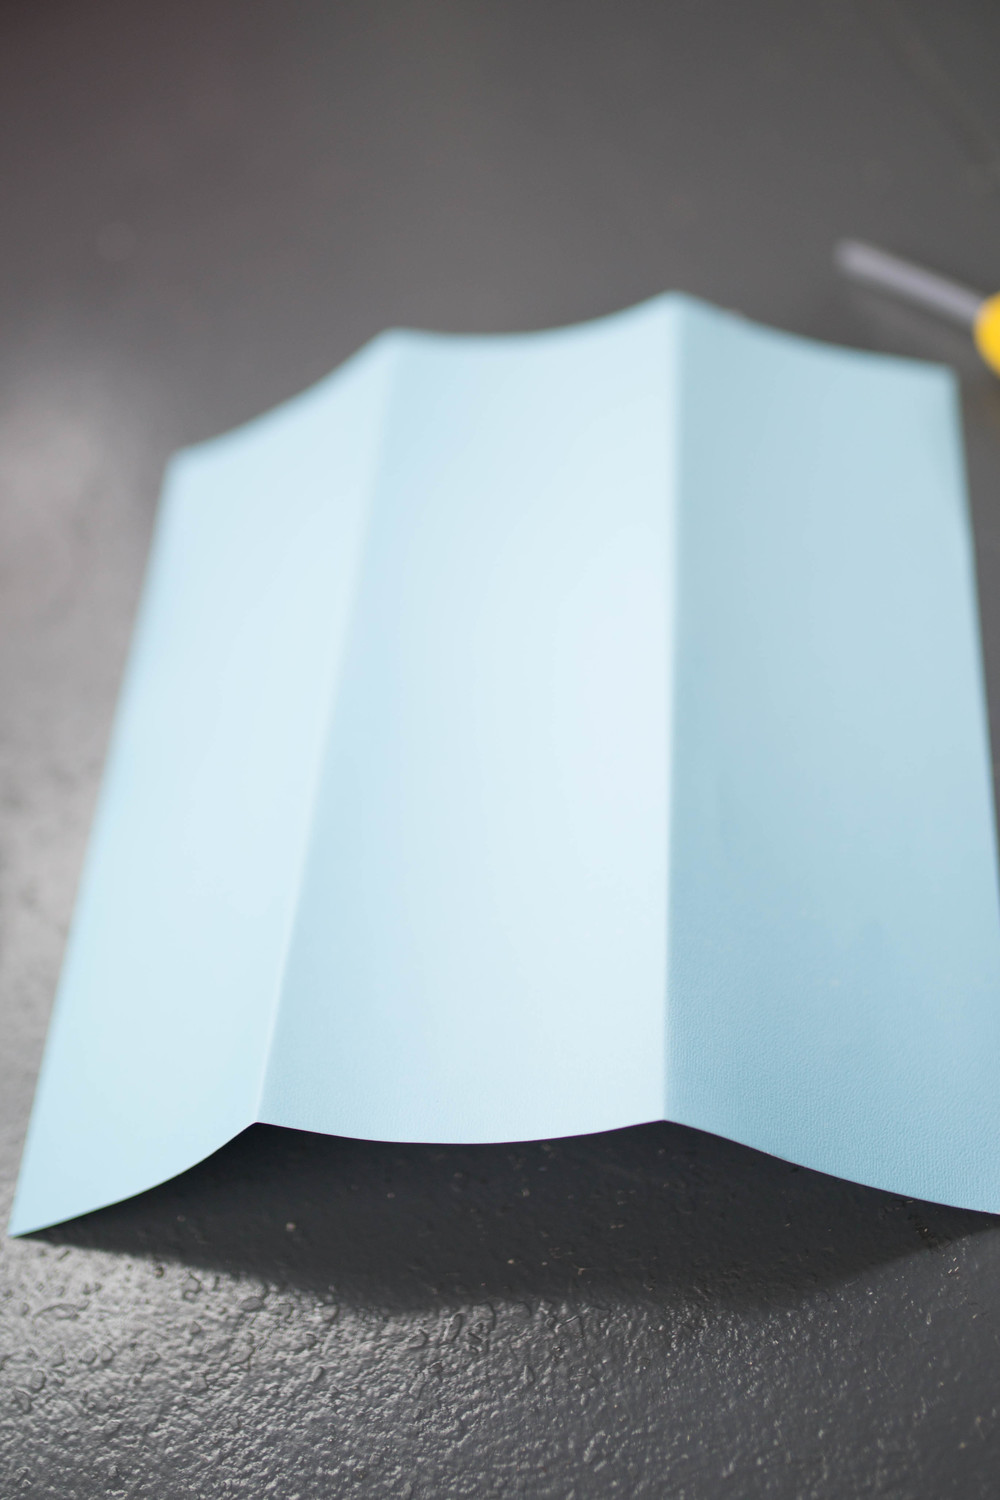
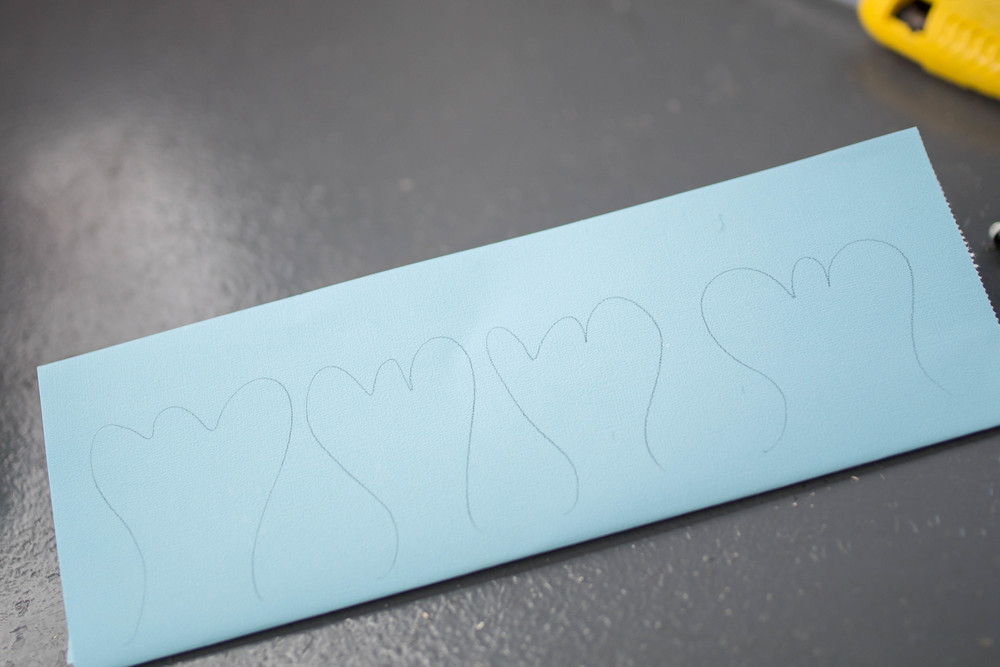
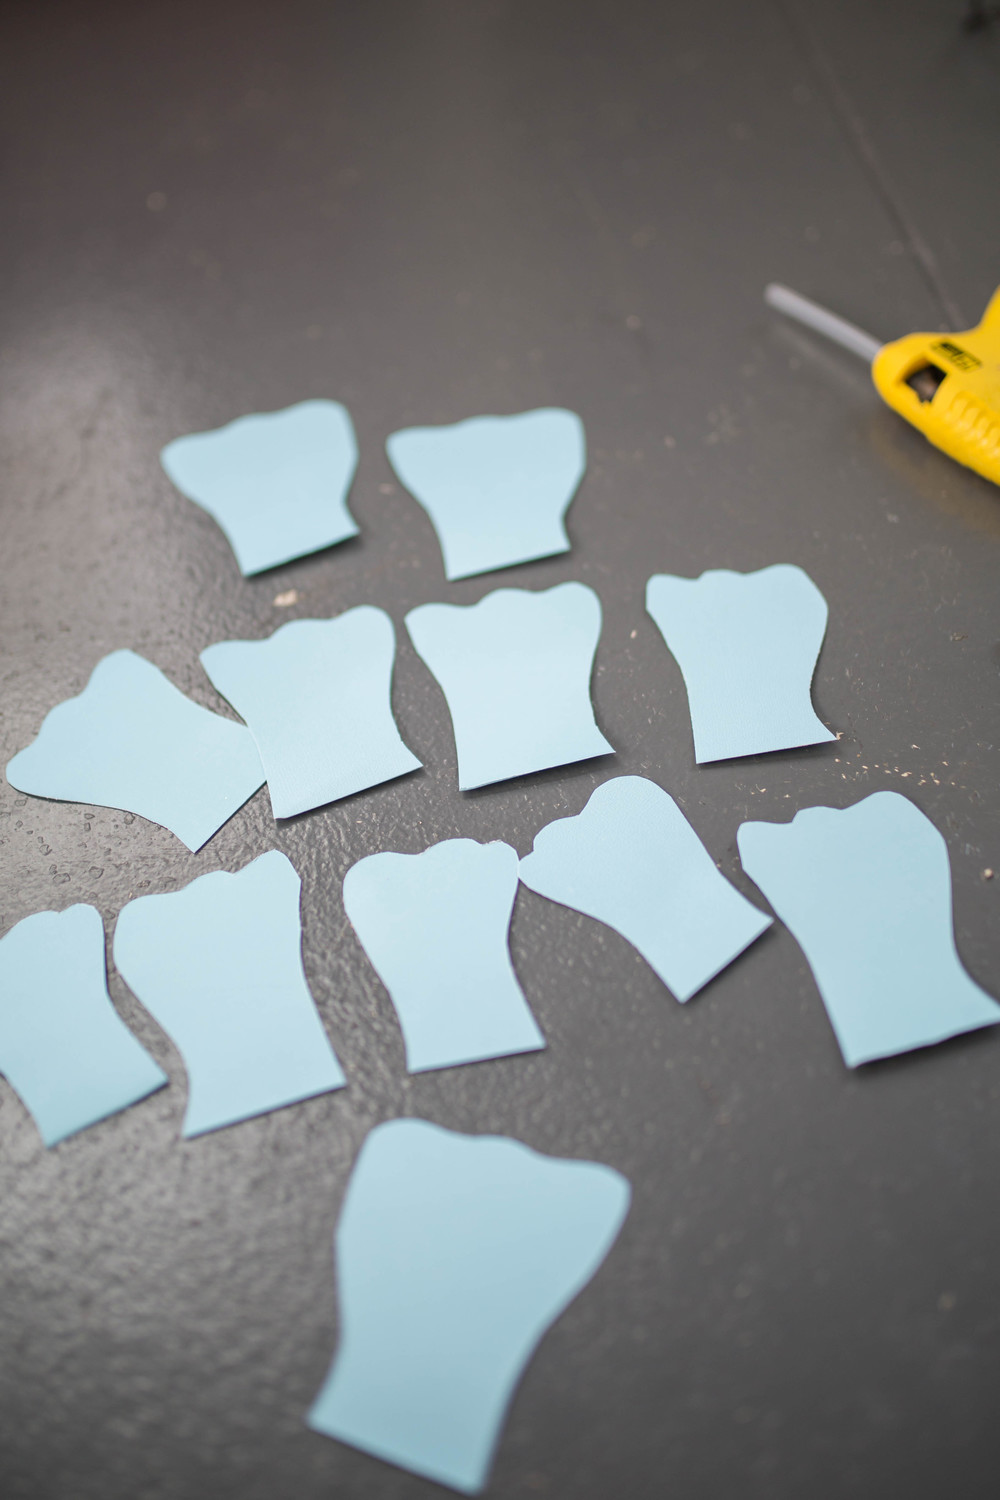
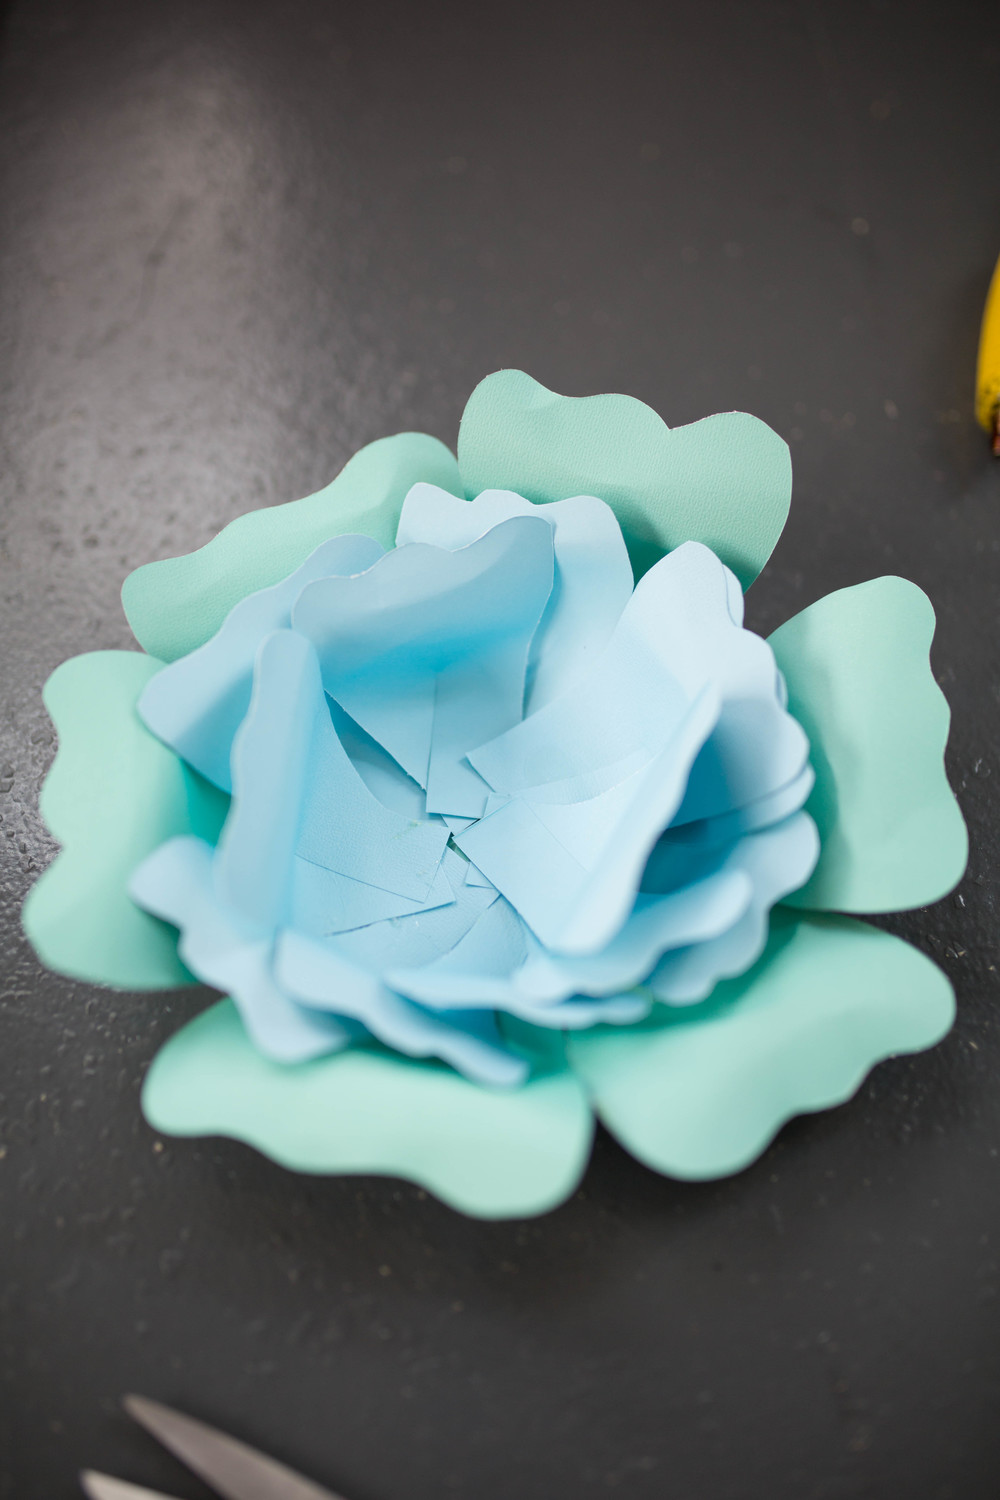
#1. Also, Take one of your 12×12 pieces of scrapbook paper — Fold it in half / After doing this I want you to draw the shape shown in the pictures, three times– Remember, this is the flower pedal, it does not need to be perfect! Draw, then cut…. this should leave you with six separate pedals 🙂 — Plug in the hot glue gun!!!!!
Wanna see more amazing photos!? Click HERE!!!!
TIPS for DIY Projects

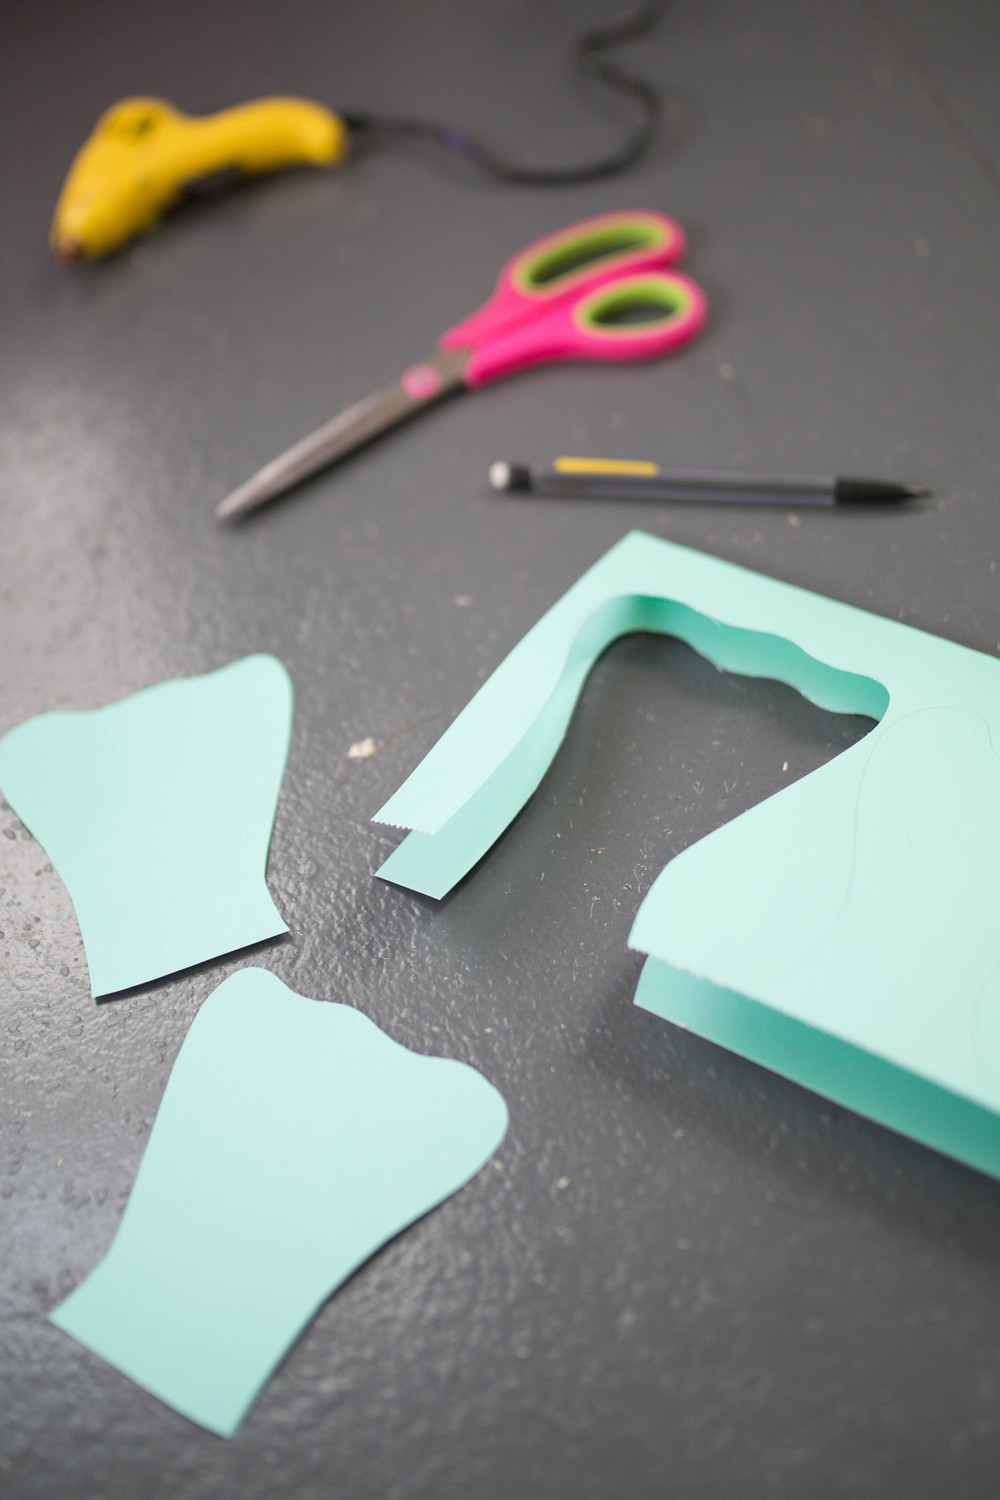
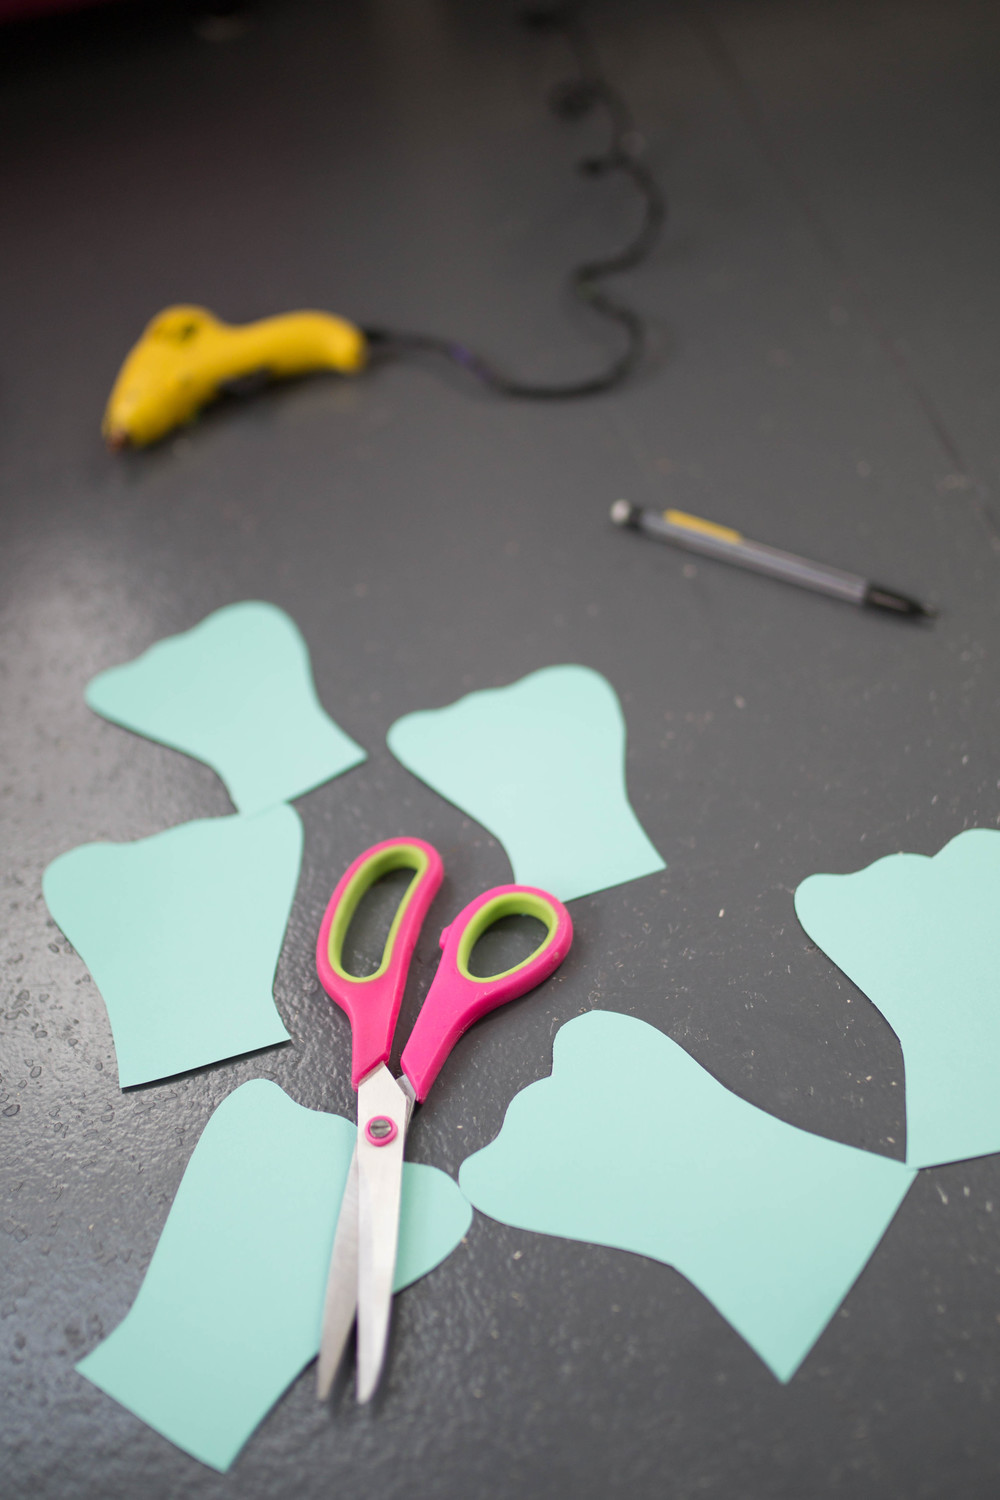
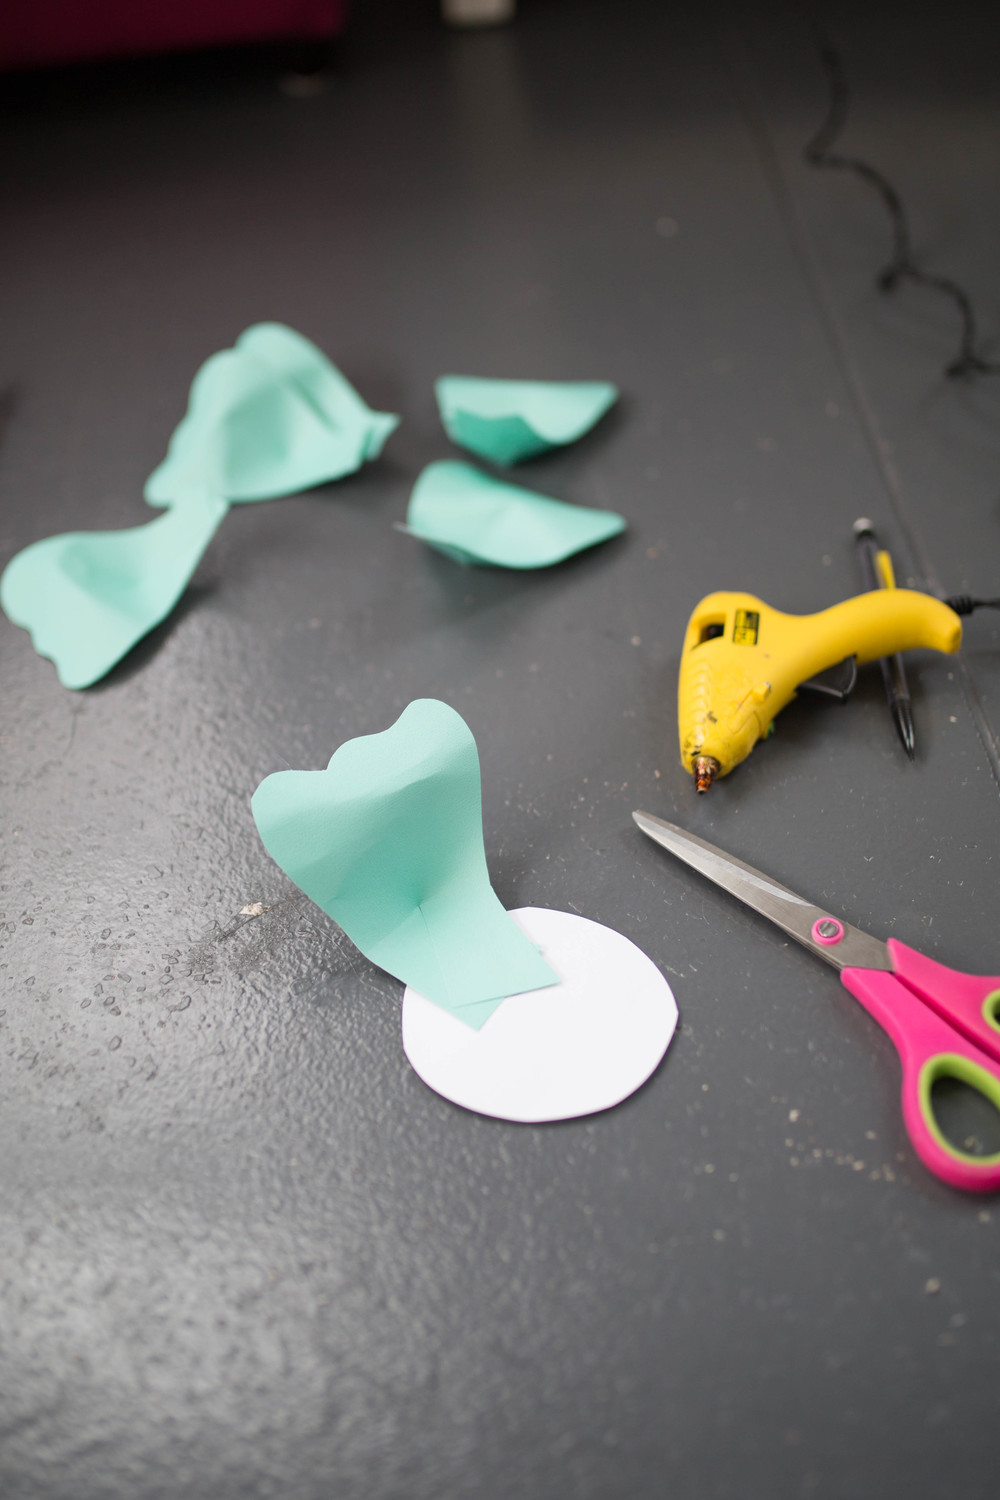
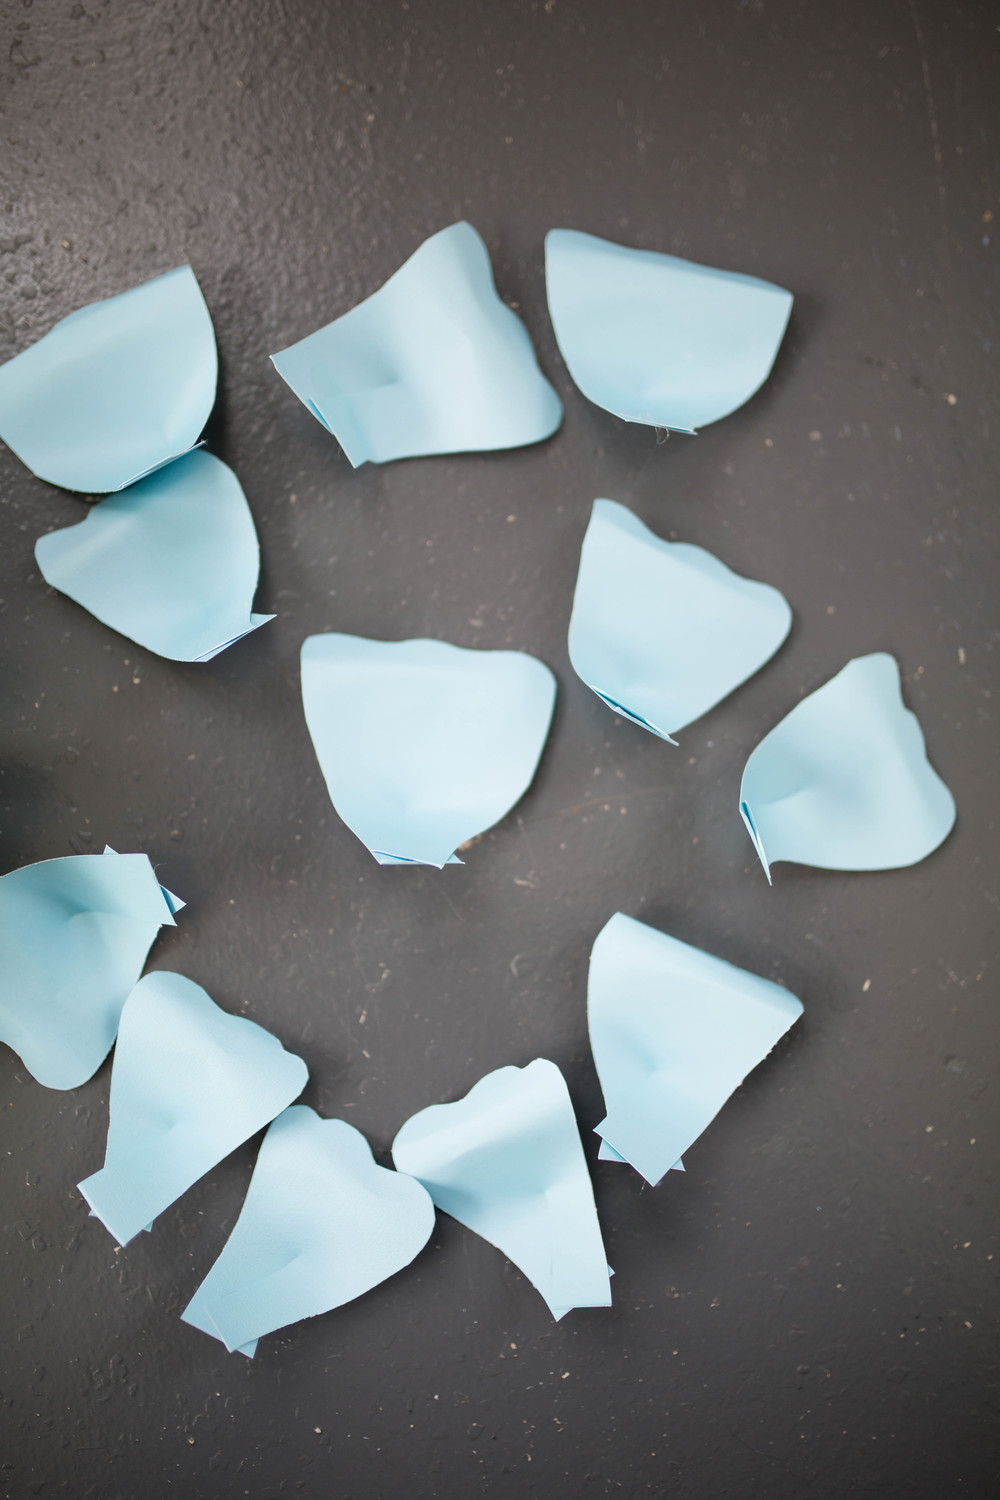
Okay… so now you have the outside pedals of the DIY Paper Flower! I now want you to cut a slit in each pedal, cutting to the center of the pedal {As shown in picture below!}
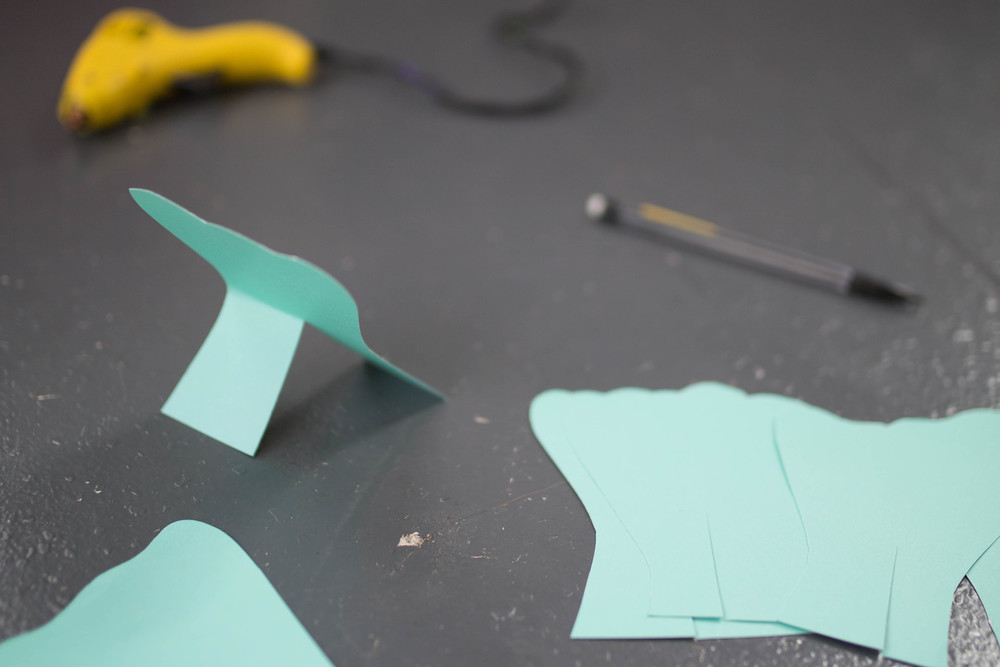
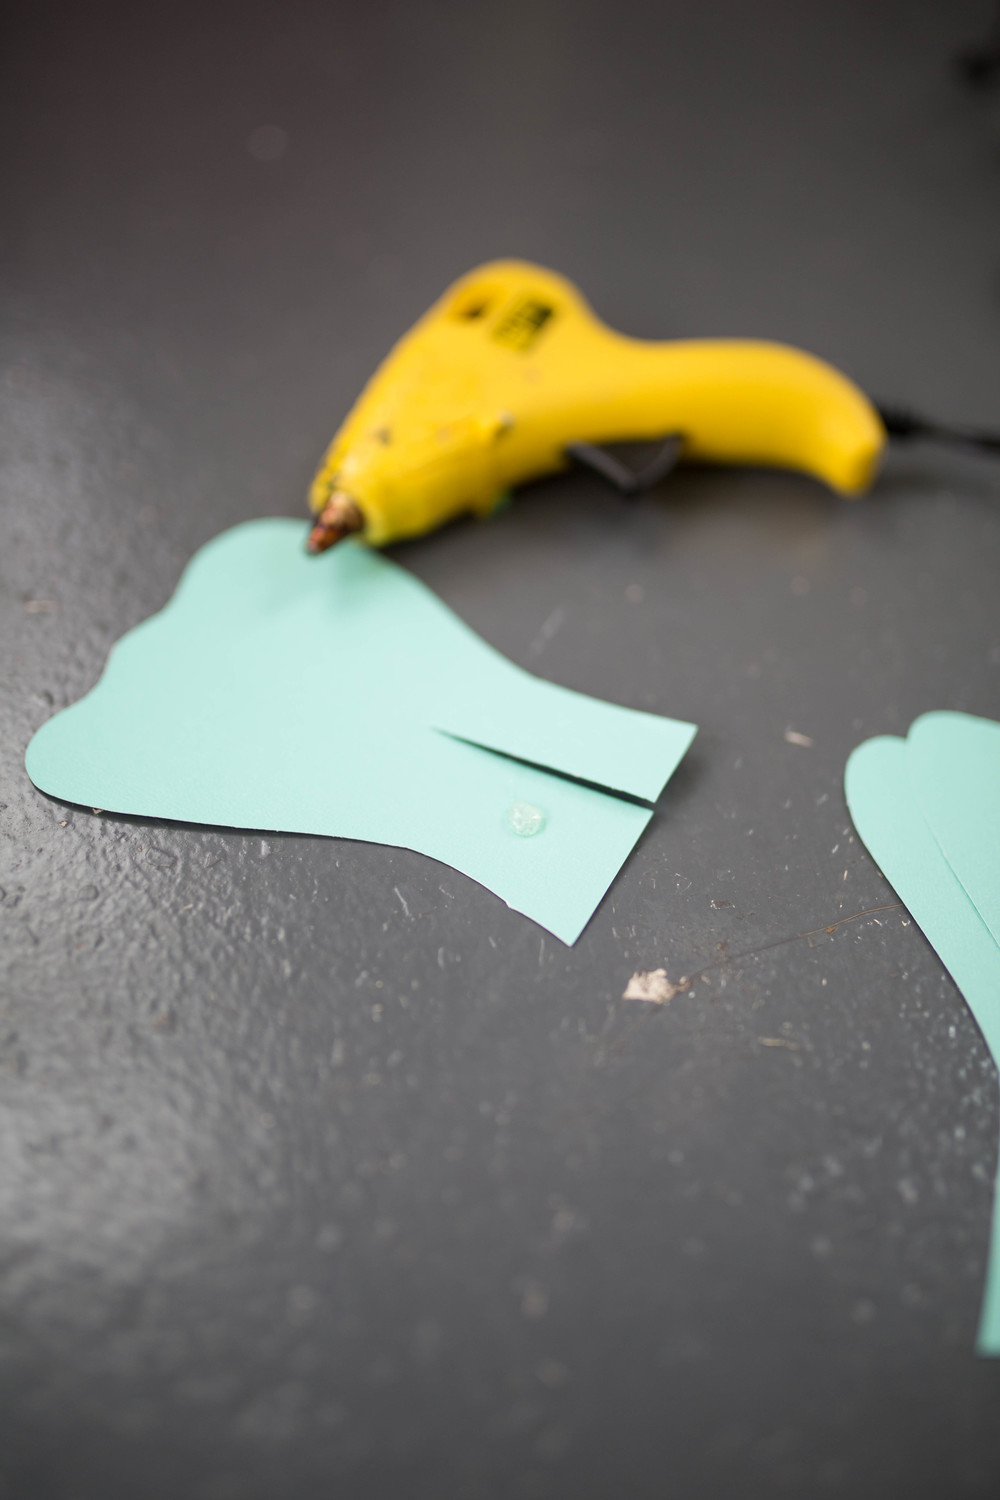
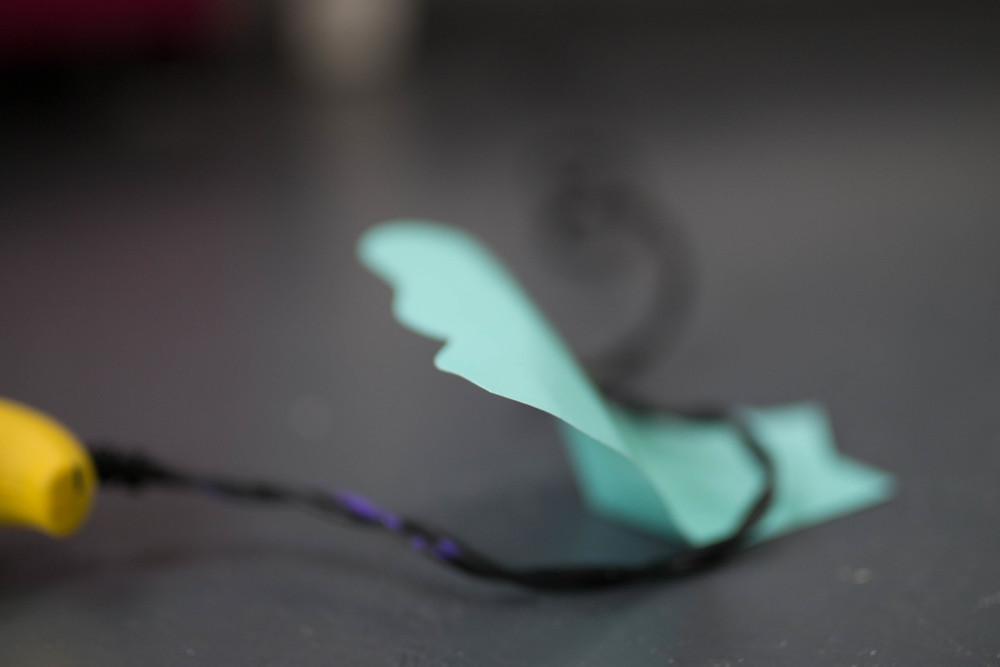
OK! Good JOB!!!!! Now lets grab the hot glue gun! Place a “dab” of hot glue on the left of the cut slit, and cross over the right side and stick them together… creating a somewhat cone out of the pedal… and then bend the pedal leaf to create a curve! check out the pics for better idea of whats going on! 🙂
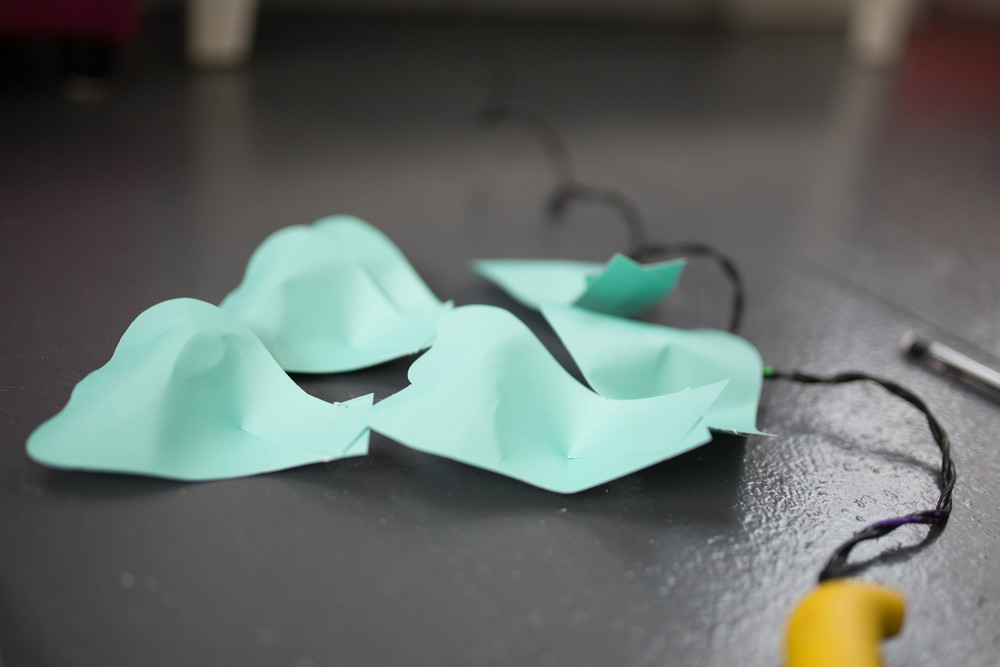
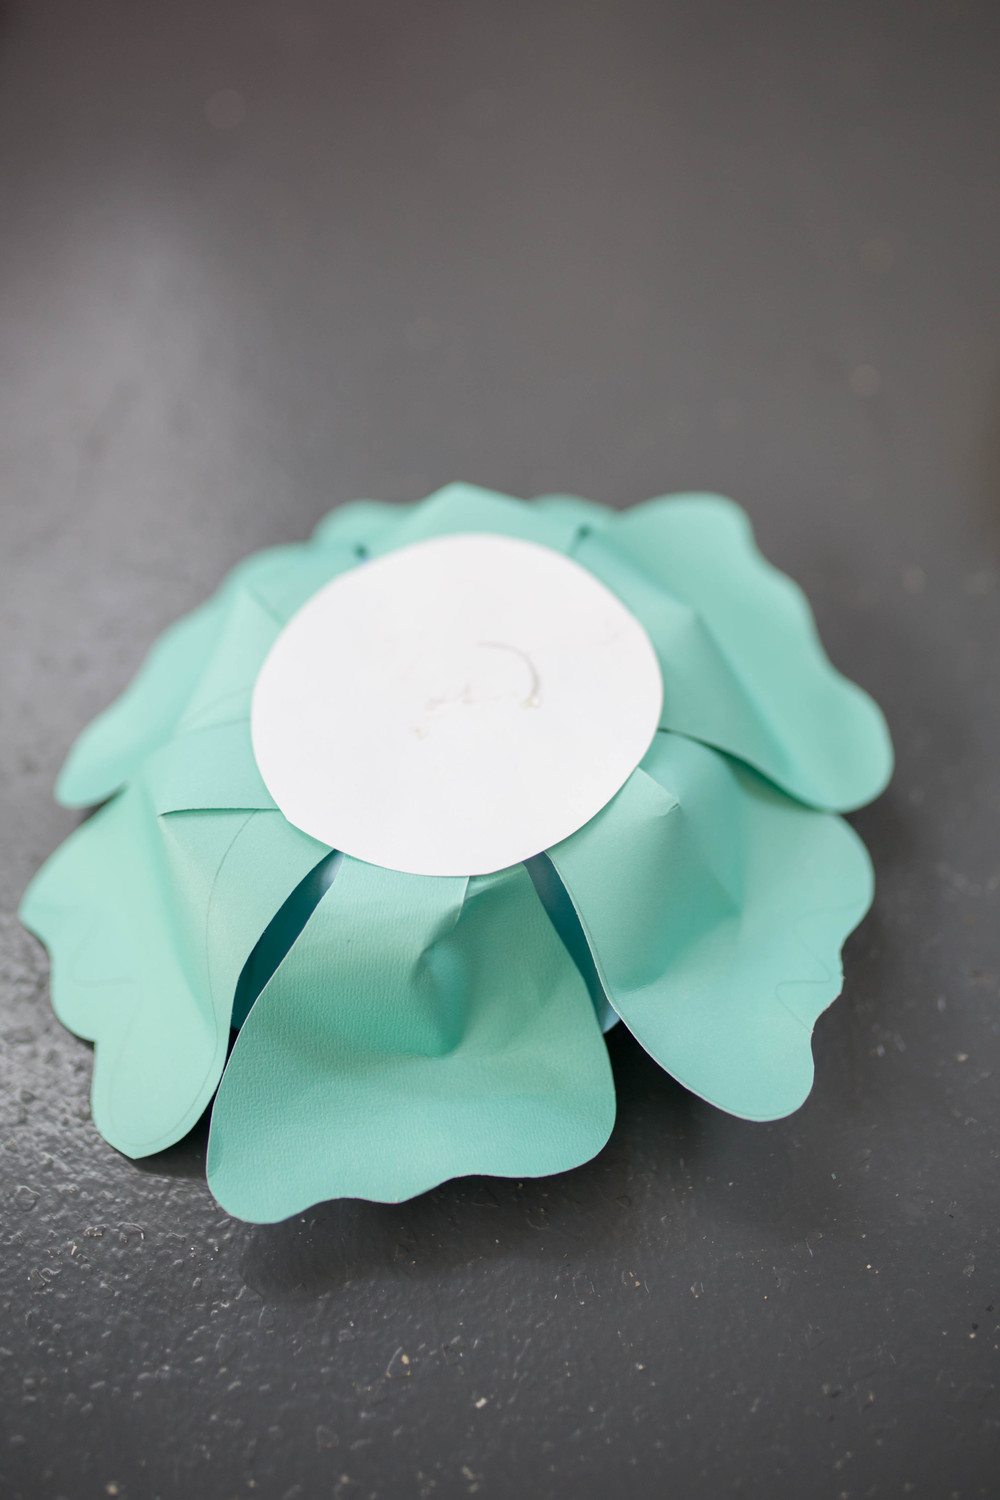
Alrighty… now grab your larger white circle {This should be construction paper} and glue the six pedals to the white circle construction paper, make sure to spread them out!
Great Job!! Im going to remind you again, this doesn’t have to be perfect, just have fun!
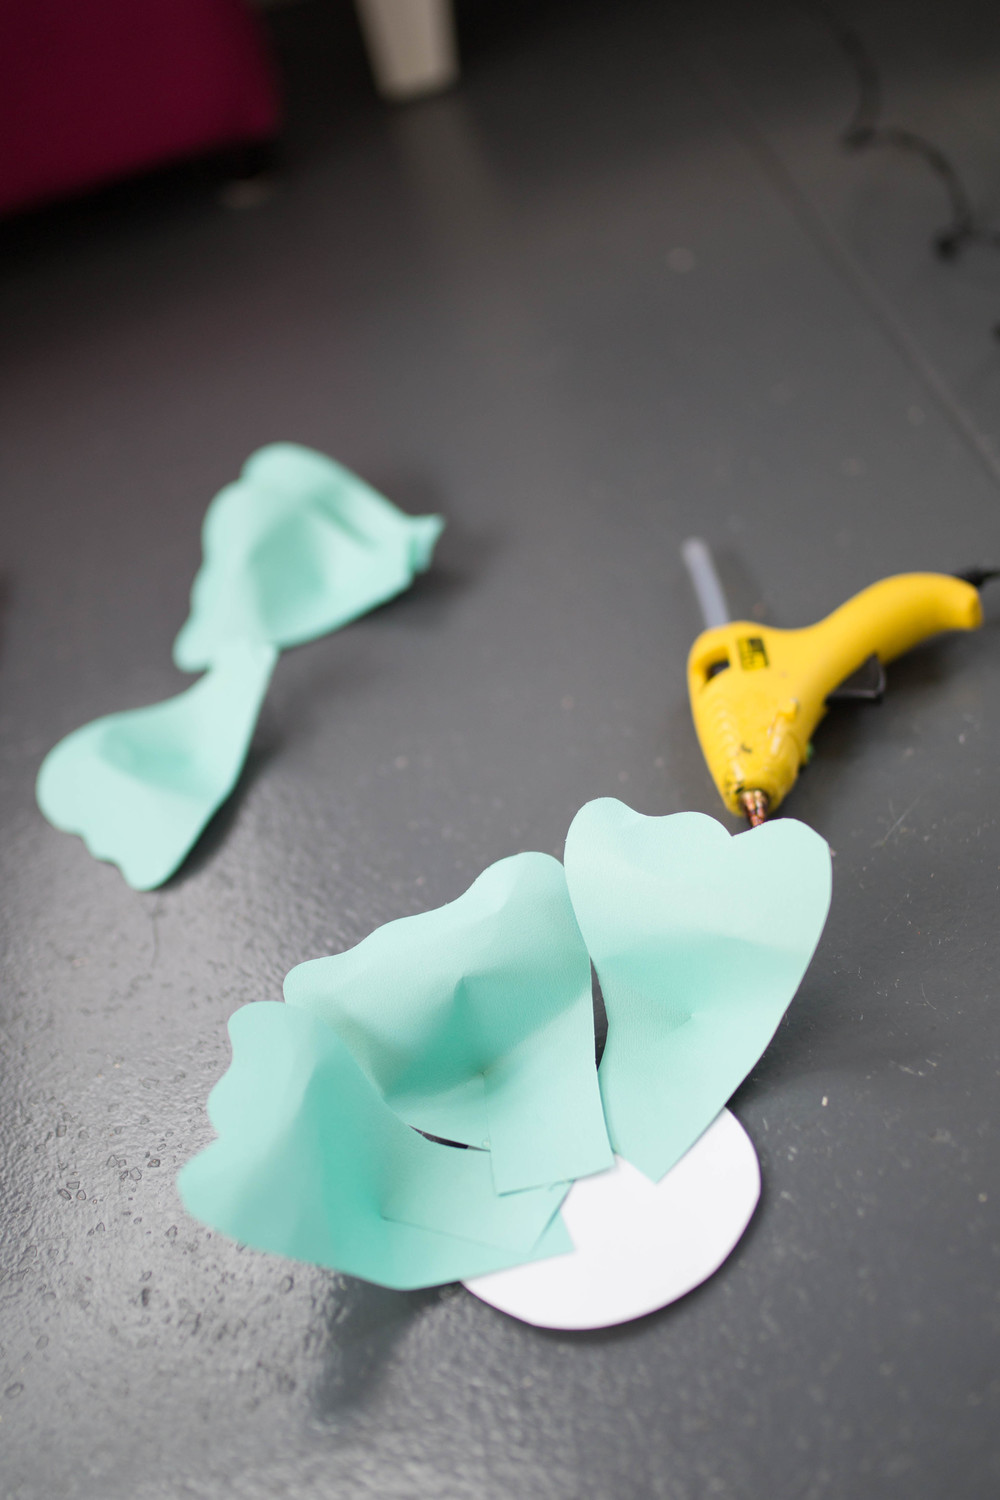
Now… #2… {I told you I was bad at this!!!} Lets start layering this flower!! Grab your second piece of construction paper, don’t fold on half, but fold it twice, creating two creases and three sections! Again, draw the pedal shape, but this time do it four times, not three… and they will be smaller than the first set you did…
Cool!! Now you should have 12 smaller pedals!! & repeat exactly what you did for the first set of six pedals.. and start layering them! Add them randomly where you feel like they should go.. there is no right or wrong way to do this!
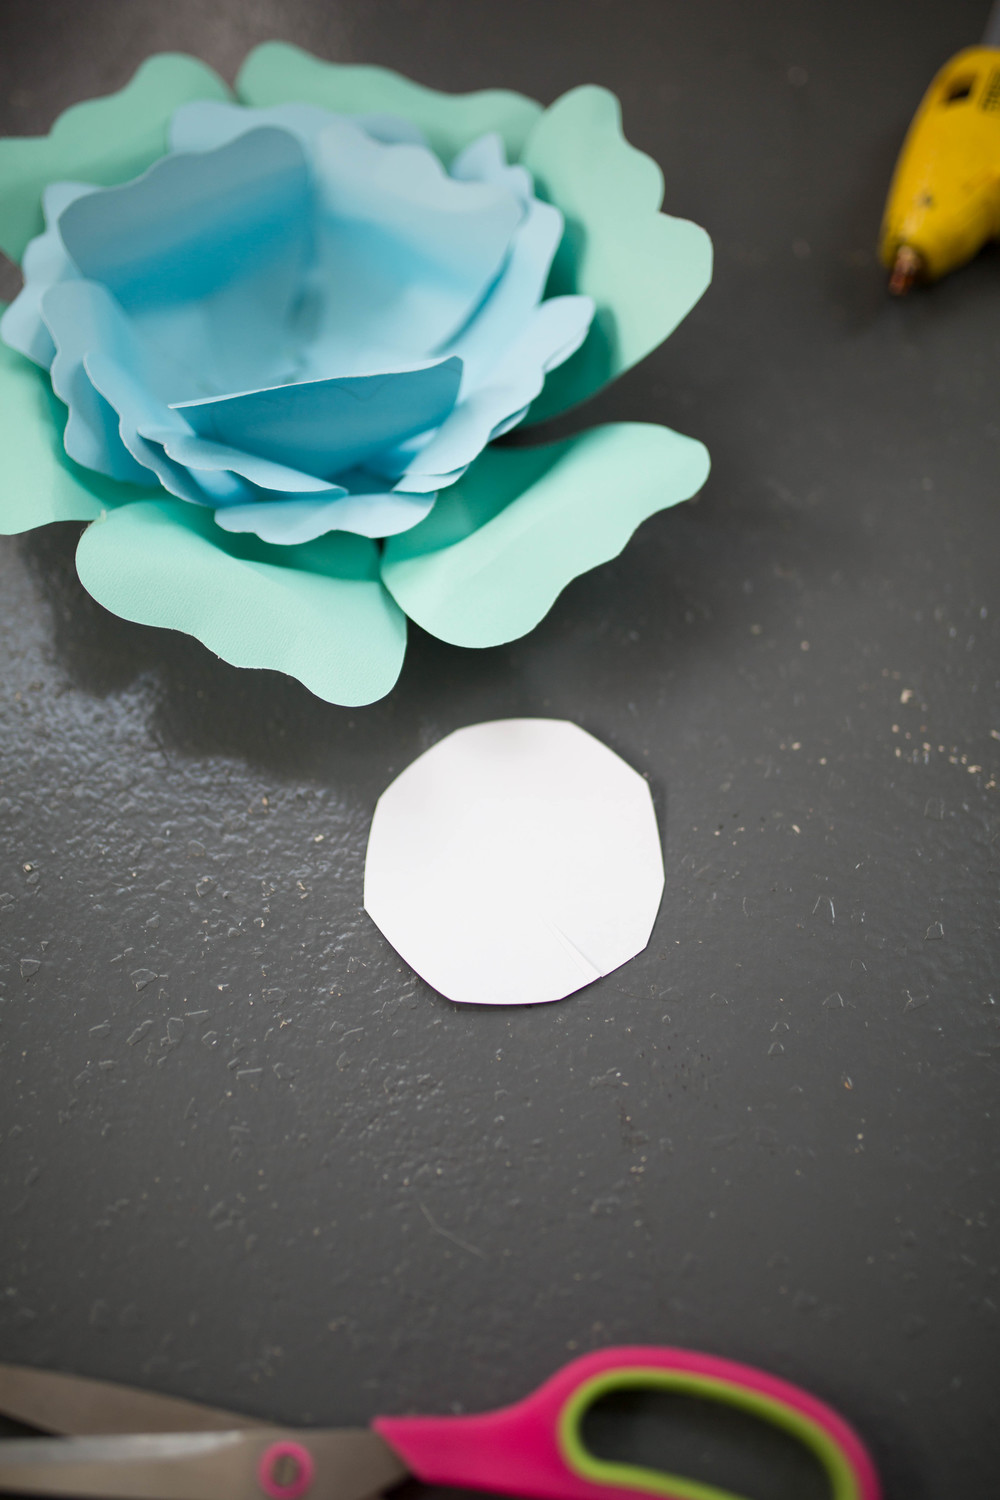
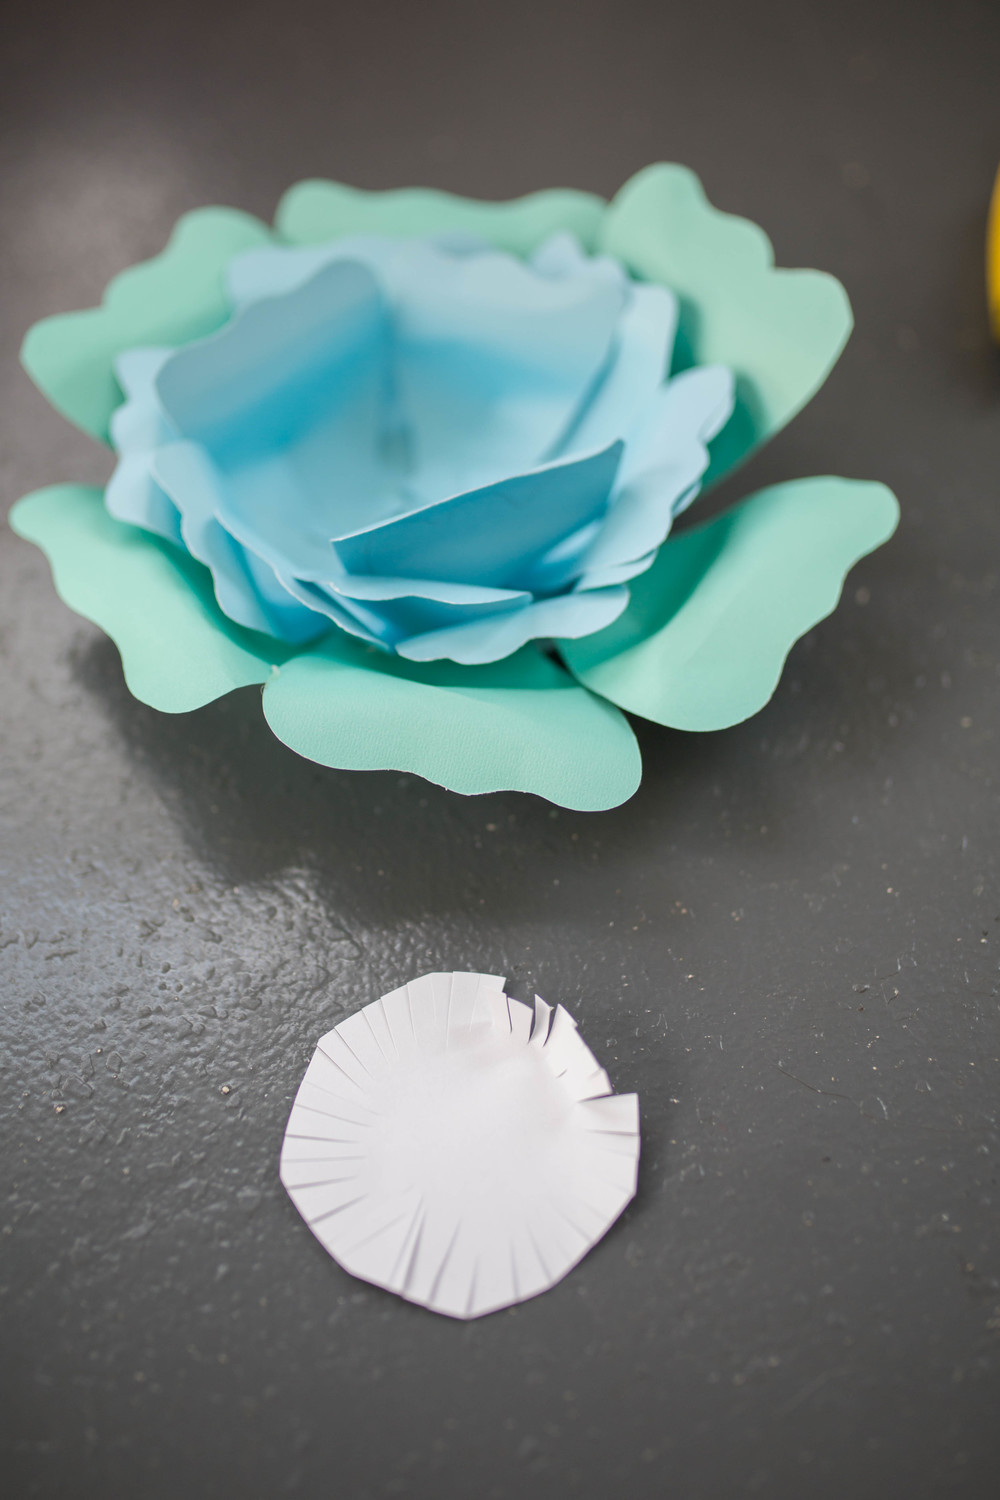
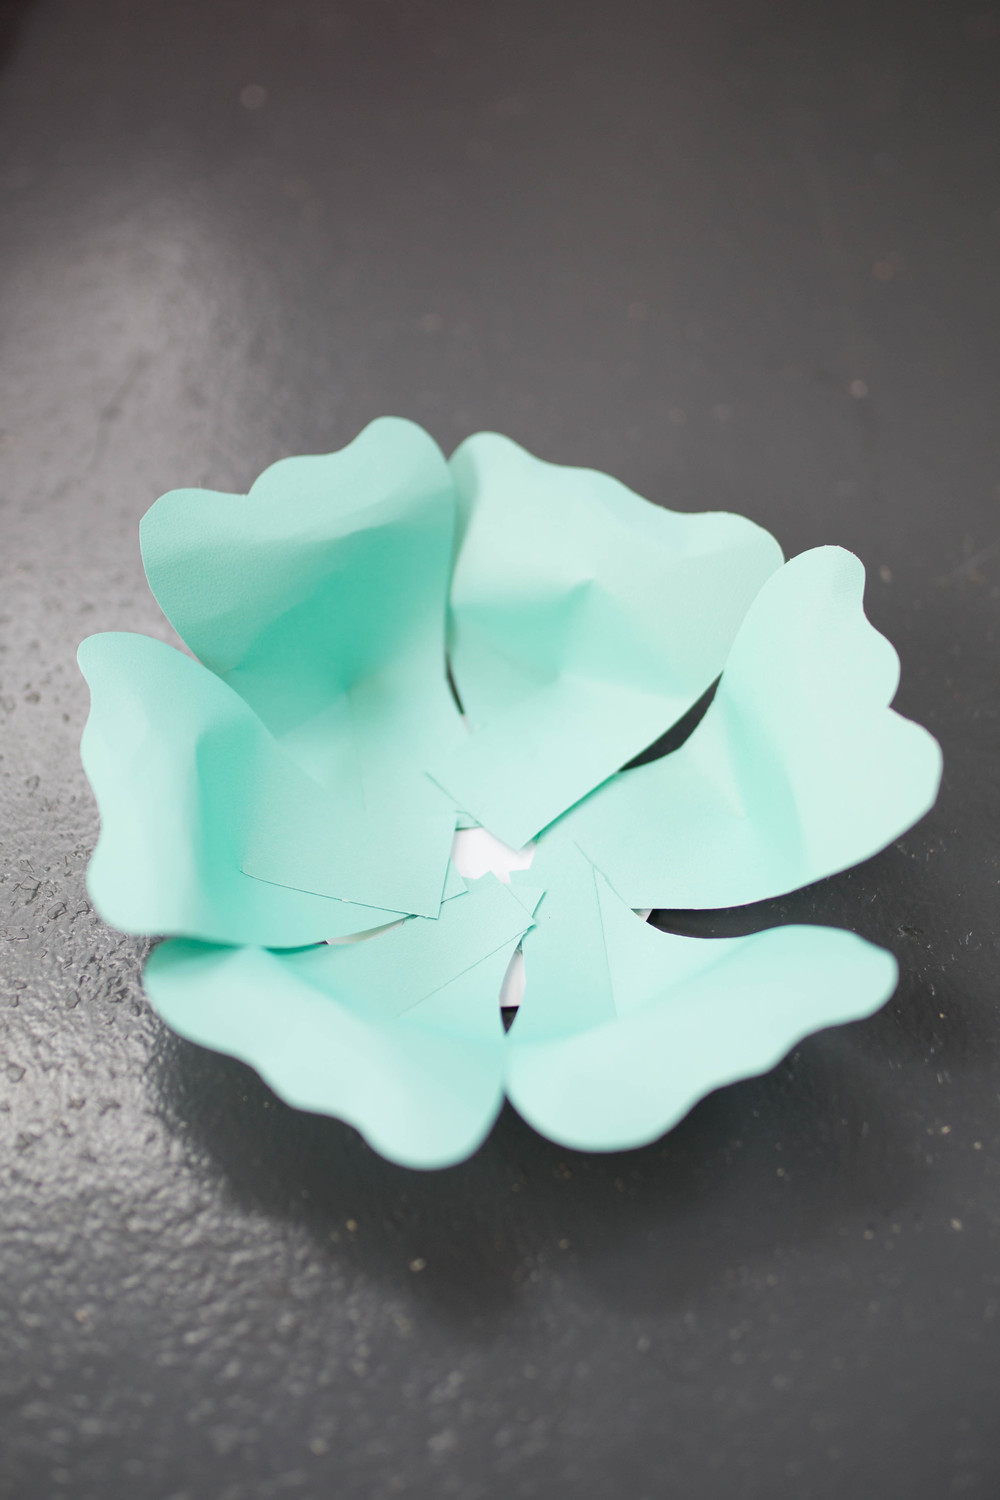
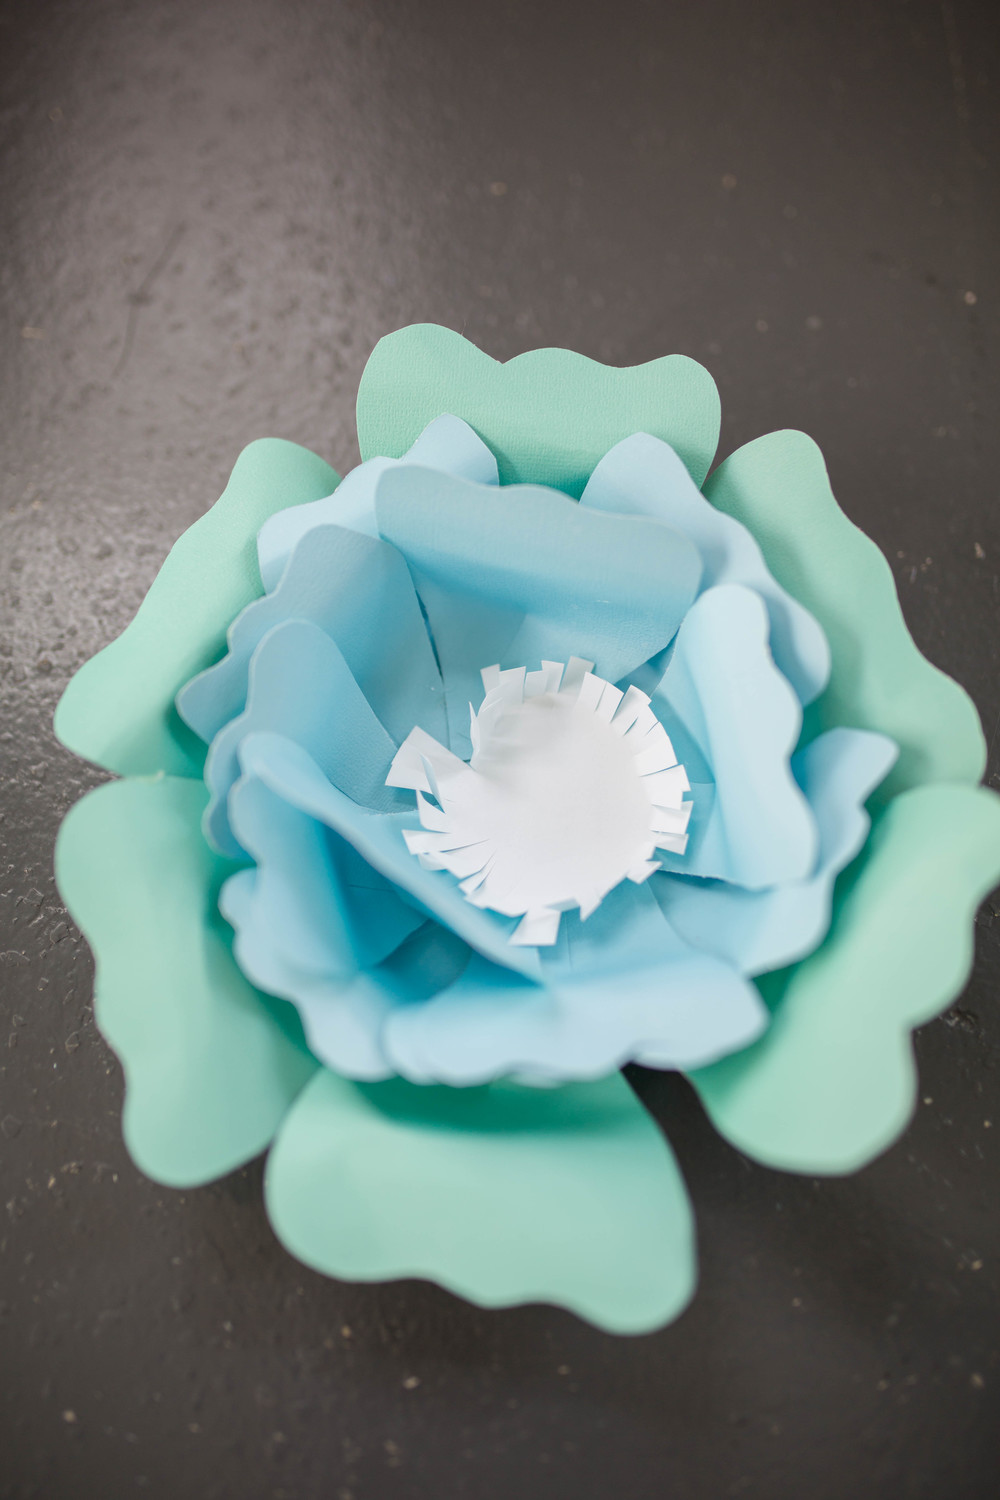
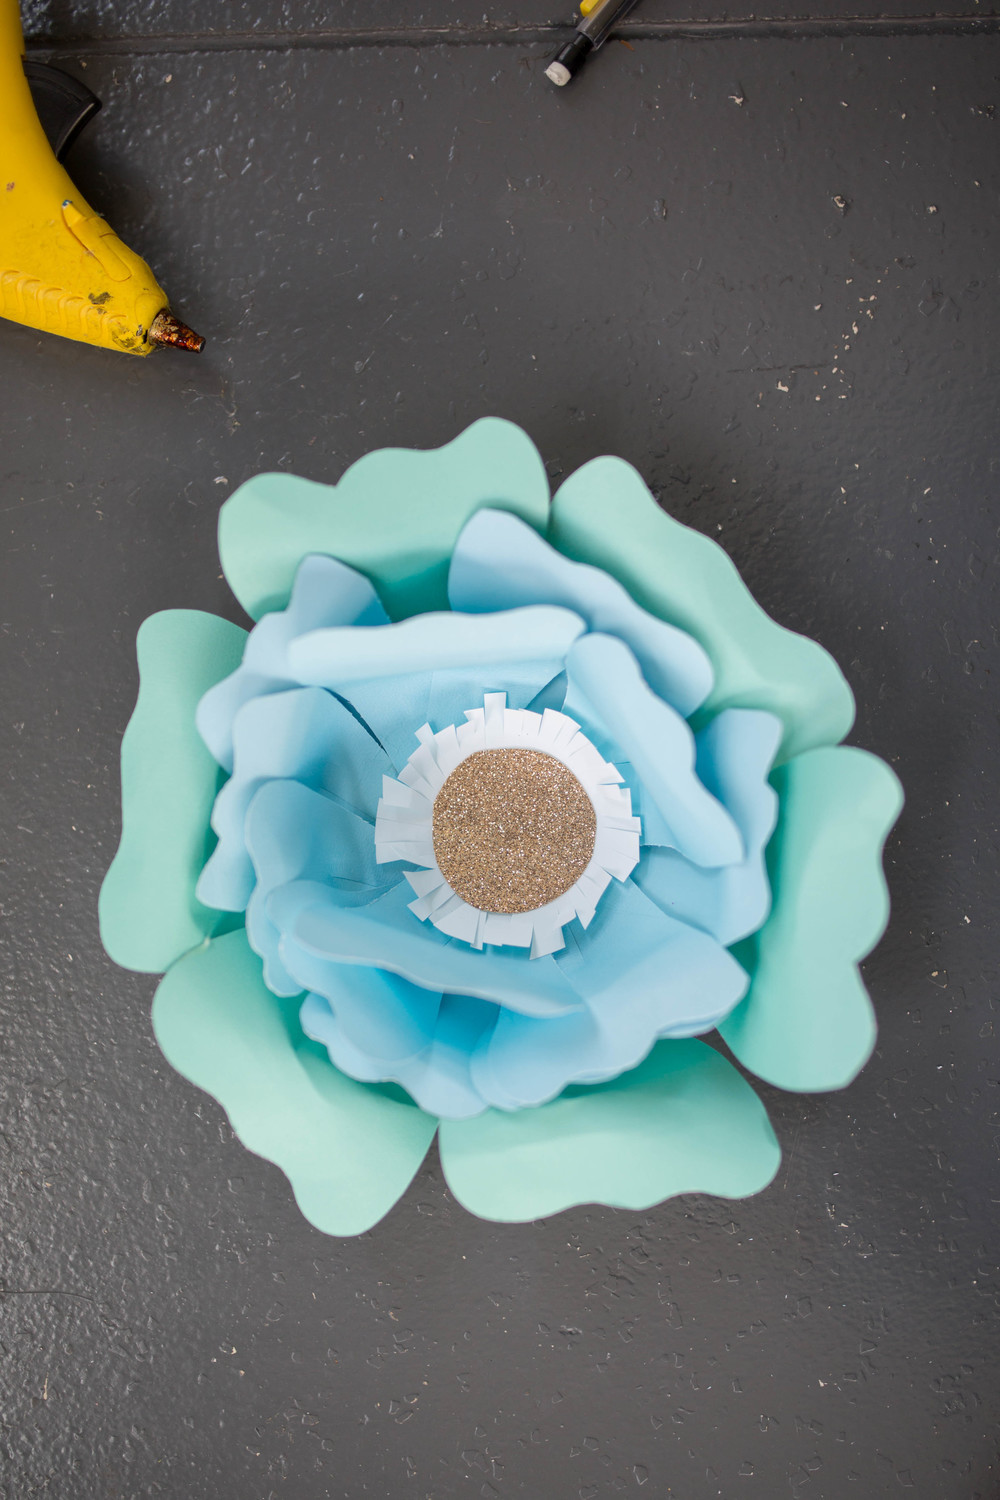
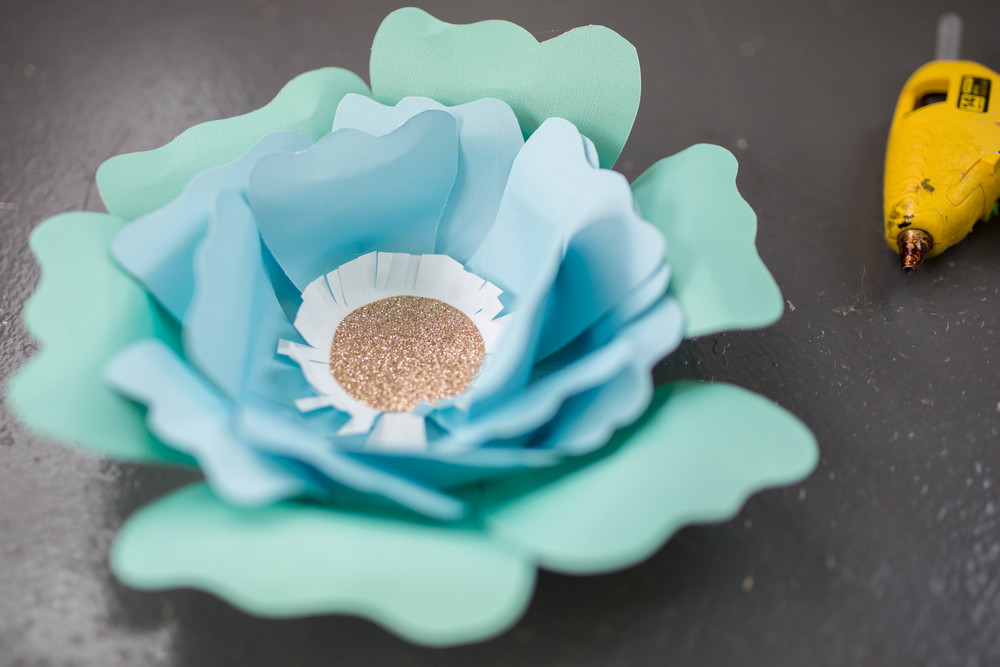
Cool!! Great job! All in all, Your almost done!! And just a side note…. Altogether, feel free to add more pedals!!!!!! So i’m guessing you can see the white circle… this circle should be smaller than the circle you used as your base… but if not, no worries!!! Take that smaller circle and cut little slits {as shown in the pic above this} and also, just fold them up a little to add some texture!! Now lastly!!!!!! Also, glue the white {or whatever color you would like} in the center of the flower!!!! All in all, Now for the glitter paper, I love glitter!!!!! Add some glue to it.. and also stick it inside the white one {so this circle should be slightly smaller than the other} and BOOM!!!! You have an awesome
DIY Paper flower!!!!!!!!!!! <3
Yay!! All in all, I would love to also see what you guys all created so please add a photo of your final piece!! <3 Hope this helped and I hope I made everything make sense !! Make sure you also like Hannah Ruth Photography’s facebook page for more fun all in all, photography & ideas!!!


